Challenge #1 for the Counterfeit Kit Challenge is to draw inspiration from one of our Master Forgers. I am always in awe as I peruse the works of my partners in crime and see their varied talents, but I decided to choose one of our newest Master Forgers who also happens to be my scrapbestie.
I "met" Leslie S. (LCSmithSAVED) online in October 2010 during Lain Ehmann's Layout A Day Challenge and over the years we have developed a special friendship. She has helped me grow as a scrapper and has taught me some valuable scrappy lessons that I have applied to my own layouts. Leslie's CKC "audition challenge" was to create a self portrait layout.
Leslie's #1 Motto: Make the patterned paper work for you!
You can see that I implemented all of her techniques! Chevron stamped in black...check. Sun outlined in black pen...check. Tropical flowers fussy cut...check. Upper thread is orange. Lower bobbin thread is red, but you would never know it!
Leslie has such a great style and eye for pattern. We are so lucky to have her on our team. Check out her blog...you are sure to be inspired!
Hi-Ho! It is Kermit the Frog, um, I mean...Lynnette the Master Forger here to introduce this month's inspiration kit and my take on it for the Counterfeit Kit Challenge blog. But before we get started, let me give a warm welcome to this month's guest designer, Laura and our new Master Forgers...Ashley, Dawn, Julene, Lesley, Leslie and Stephanie. Welcome to this wonderful world of creativity!
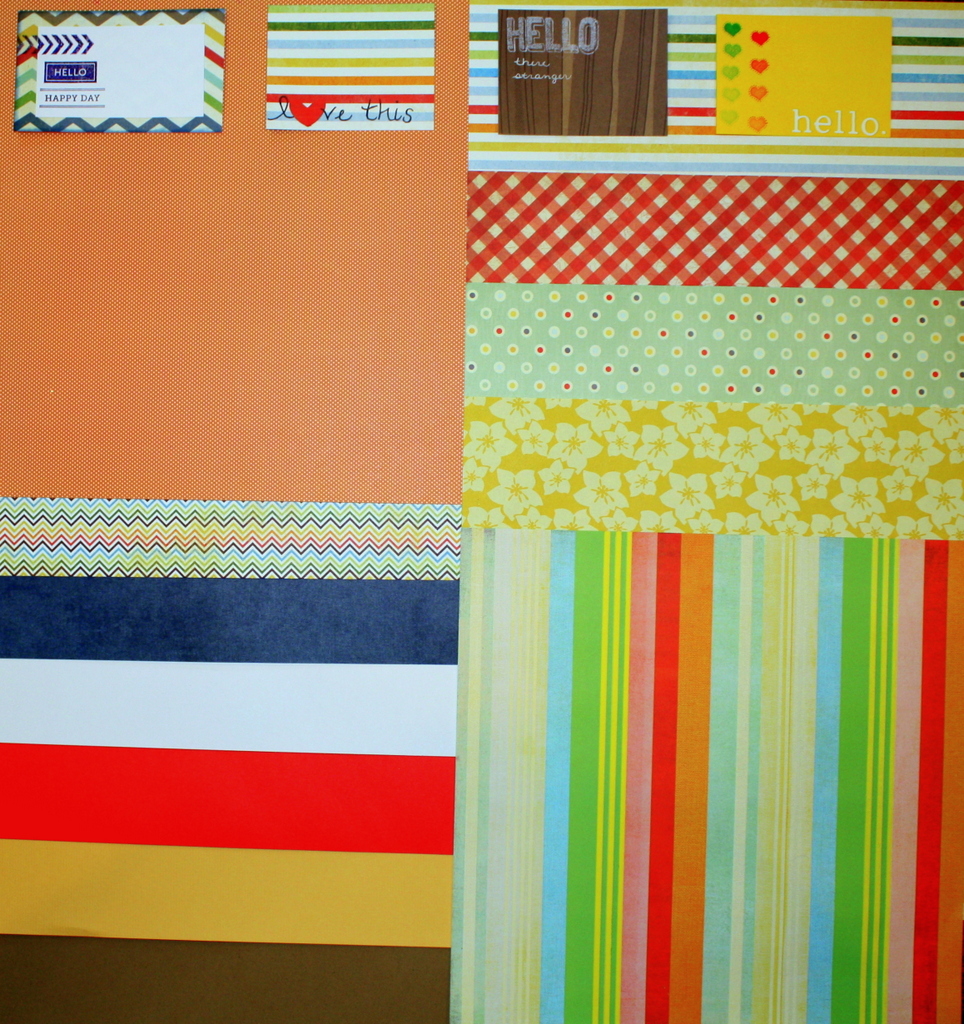
Now, let's take a look at the kit-to-copy entitled, "Summer Fun" from Scrapbook & Cards Today:
You may be wondering why I started this post off with a greeting from Kermit the Frog. My kit last month was FULL of green and I wasn't speaking "frog" then. Let me explain. Whenever I first look at the new inspiration kit, I often jot down words that come to mind while studying it. The striped "Love this" card on the left immediately jumped out at me and I jotted down "rainbow". Couple that with the fact that for the last month and a half my son was learning to play the song, "Rainbow Connection" from the original Muppet movie on the piano and the inspiration for my kit was born, or should I say, hatched!
So, if you've been wondering why there are so many songs about rainbows* and what's on the other side, come check out my July Counterfeit Kit lovingly named...
RAINBOW CONNECTION
*Other than "Somewhere Over the Rainbow", I can't actually think of any other songs about rainbows, but I digress!
Anyway, hop over on the log with me and let's get a closer look at the papers...
I followed the overall feel of the original kit pretty closely, matching colors and styles. Be sure to check out the CKC blog on the 8th for some up-close photos of those knock-off Glitz cards and more ways to "fake" your way through the kit in our monthly feature called, "Hey...I can make THAT!"
And now here's the behind-the-scenes scoop on my kit...
If you've been following me since I've started this CKC gig, you'll probably know that I really enjoy setting the stage and naming my kit. To me, it's part of the fun of assembling my own batch of creativity. I knew I wanted to include Kermit, but didn't know how to set the mood. I decided a Kermit stuffed animal would do the job, but just couldn't get my hands on one. So, what's a papercrafty masterforger to do? That's right! Make her own Kermit the Frog - complete with a banjo! I can't tell you how much fun I had putting him together. Kermie will keep me company in my scraproom long after the July kit is completed.
And now back to our regularly scheduled program of the kit reveal...
I kept this month's kit pretty lean as the kids are home on summer break, so while my intentions are good, I'm not quite sure how many layouts will come from it. Fingers (and frog legs) crossed that I get some crafty time in! Some Fancy Pants stickers in the same collection as the original kit, some clothes pins, and chipboard hearts will help make quick layouts in between our fun in the sun. I do always give myself permission to sneak in other elements as the month goes on. Remember to give yourself that freedom, too.
I always enjoyed "The Muppet Show" as a child and "The Muppet Movie" was the first movie I ever saw in a movie theater. While I don't have any photos representing those events, I think I may have to do a photo-less layout using this kit to tell those stories of my childhood.
So, now it is time for you to HOP (hehehe!) over to the ever-inspiring Millisa for her fabulous take on this kit.
If you are not familiar with Kermit's serenade of "Rainbow Connection", check it out on the You tube video below. It is such a sweet song and always chokes me up a bit. Oh, and by the way, (proud Mama alert), my son nailed the song on the piano!
Well, there's good news and bad news! The good news is I've had a super productive month with my June Counterfeit Kit, "Key Lime Pie". The bad news is I've been not as good about posting my layouts when completed. So, this post will serve as the gallery for the entire month. Unlike Kermit, I found it very "easy to be green" while using my citrus inspired kit. I also noticed that my son has the same ringer T-shirt from Old Navy in many of the pictures (that were taken on different occasions!) Guess we got our money's worth out of that one!
Here is a reminder of my "Key Lime Pie" kit:
And here are my creations:
So, you can see that I REALLY was a busy scrapper! I'll work on the blogging part :)
My June Counterfeit Kit, "Key Lime Pie" was a perfect collection for creating my farm fresh layout. I used a photo of my daughter picking peppers from our teeny, tiny 4' x 4' garden. It's just big enough to get some fresh produce and not so big that we are invaded by eggplant and zucchini and are forced to eat ratatouille all summer long.
I've never used my Cricut to its fullest capacity, so I can't really justify the investment into a Silhouette. But boy, it looks like that thing can do some cool things. Here I used my Cricut to try to achieve that negative space look that is so on-trend. I'm not savvy enough to figure out if there's a way I could do a whole title on one sheet, but this worked out pretty well on the individual tags.
Here's a closer look:
Some contrasting paper underneath, washi recycled from an envelope I received in the mail, some Mister Huey drips and twill finished off my title.
I'm looking forward to creating more fresh and fun layouts this month. Be sure to check back often.
Hello. Welcome to our June Kit Reveal and blog hop. I do hope you've worked up an appetite as I have something delicious to share with you. Counterfeit Kit Challenge has given us many options for kit-copying this month. Here are the selections, all from Scraptastic Club, from which we had to choose.
I decided to focus on the "After the Storm" kit as pictured here:
The color green is what first struck me when studying this kit. I also noticed that between the kraft and corrugated cardboard, a good deal of brown is represented. And when I see green and brown together, I think of this...
Presenting my June Counterfeit Kit
KEY LIME PIE
(insert groan here!)
Just as Key Lime Pie is rich and decadent, I whipped up a kit to match the lusciousness of one of my favorite desserts. First, let's take a look at the main ingredients (aka the papers)
I followed the inspiration kit's lead with the solid cardstock, but then just took off "going green" with the other papers. Of course, I HAD to include the tangy lime slices!
Next, let's look at the ingredients that will make my layouts sweet.
A generous pinch of Studio Calico Wood veneers along with a dash of washi will ensure success.
One cup of corrugated cardboard butterflies and 1/4 cup of Basic Grey flags yield scrumptious layouts.
Equal parts Distress Ink (in Lemonade and Shabby Shutters) along with some Thickers in 2 shades of green are some of the secret ingredients! (Shhhh...don't tell!)
The Key Lime Pie recipe is stored safely away in this recipe basket, but on top you can find a variety of journaling tags to add special stories to layouts.
I don't have a Silhouette, but my good old Cricut helped me to create a little "sunshine" tag. Those papers with negative space cut outs are so popular right now. And you can't have Key Lime Pie without the limes OR lime green flowers and baker's twine.
So, let's bring it all together again and take a look...
Ready for a slice? Perhaps with a generous dollop of fresh whipped cream and garnished with a fresh lime? Oh...I wish I could really offer you some! Instead, I hope I have offered you some inspiration to create your own kit this month. Whether you choose "After the Storm" or any of the other fabulous inspiration kits, I hope you play along with us this month. Be sure to link up your creations with Mr. Linky over at the CKC blog. And if it's any consolation on not being able to offer you a slice of pie, consider this - at least your kit will be sugar-free, fat-free, and cholesterol-free, but full of 100% scrappy goodness!
If you've just stumbled in here, be sure to check out the rest of the design team's blogs for yummy inspiration.
Did you notice those cool wood bingo chips by Crate Paper in the add-on kit? No...you don't remember? I know, there's so much to see and take in. Well, here's a picture to refresh your memory...
There they are on the right!
They are a versatile little embellishment that can be used on many types of layouts - not just the one where you won the mega-jackpot at the local firehouse Bingo Bonanza! They are great for a vintage flair, masculine pages, a graphic, modern feel...really anywhere. And with this how-to post, you can customize the chips to include the significant numbers in your life like house number, age, speed limit, etc. The assorted bag you get from Crate Paper may or may not have YOUR lucky number. So let's get started!
Here is my counterfeit version
Let me show you how you can make them! Let's gather some supplies.
Be sure to grab your heat gun, too!
You will want to punch out circles using a 1 inch punch. I used a cream cardstock to resemble the light wood of the original.
I outlined the circle using a red marker. Perhaps an unnecessary step, but I found it made a deeper red outline once I embossed.
Using an embossing pen, I again outlined over my red marker. I even dipped my pen in a pool of extra clear embossing ink to achieve a thick red rim around my chip.
Sprinkle red embossing powder.
Shake off excess and use a paint brush to remove any remaining.
I used my piercer to hold the circle in place while I heat set.
Use number rubber stamps to add the significant numbers in your life.
Punch another circle and add pop dots. Add your embossed number to the top.
And there you have it! A knock-off version of Crate Paper's Bingo Chips.
Here are some examples of them in use:
The "69" chip was perfectly crafted to designate the year of my hubby's VW Bug. Not certain I would have found that in the pack.
Go ahead and give them a try yourself and add them to your next layout!
I had a loose interpretation of this prompt as I think my anchor (on the yellow paper) is really more of a stencil than a mask. Or, is a stencil a type of mask? I suppose you can say that part of the background paper is masked to create the anchor shape. In any event, I cut out an anchor, used a small sponge and dabbed away with paint. Let's call it a mask!
I did a lot of counterfeiting this month - which was really satisfying. I had so much fun using my white gel pen to create some chalkboard art. And this seemed like the perfect photo for the page.
And to add to the nautical feel, I whipped up some flags to attach to my chalkboard rope. This was definitely a step outside of my comfort zone, but I have to say...I am thrilled with the results.